Editing a PDF on a Mac might seem daunting at first, especially for those new to the Apple ecosystem. However, with the right tools and a bit of guidance, it can be a straightforward task. Here’s a detailed guide on how to edit a PDF on your Mac, making use of both built-in tools and free online resources.
1. Edit a PDF using Quick Look
Quick Look is a handy feature on Mac that lets you view and perform quick edits on your PDFs without opening a full-fledged application. Here’s how you can use it:
1. Find the PDF you want to edit on your Mac. Select the file and press the spacebar on your keyboard. This will open Quick Look, allowing you to preview the PDF.
2. In the Quick Look window, click the pencil icon to enter the editing mode. This will bring up a toolbar with various editing tools.
3. You will see a bar of editing tools including options to add text, draw shapes, and more.
Tip: If you need more advanced editing features, try the Edit PDF Tool by PDF to PDF. It’s a free online tool that offers extensive editing capabilities, ideal for adding annotations, signatures, and more.
2. Edit a PDF using Preview
Preview is a versatile application that comes pre-installed on all Macs. It allows you to view and edit PDFs with ease.
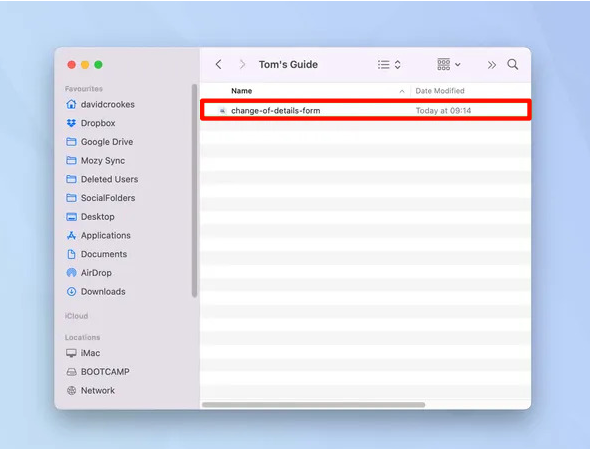
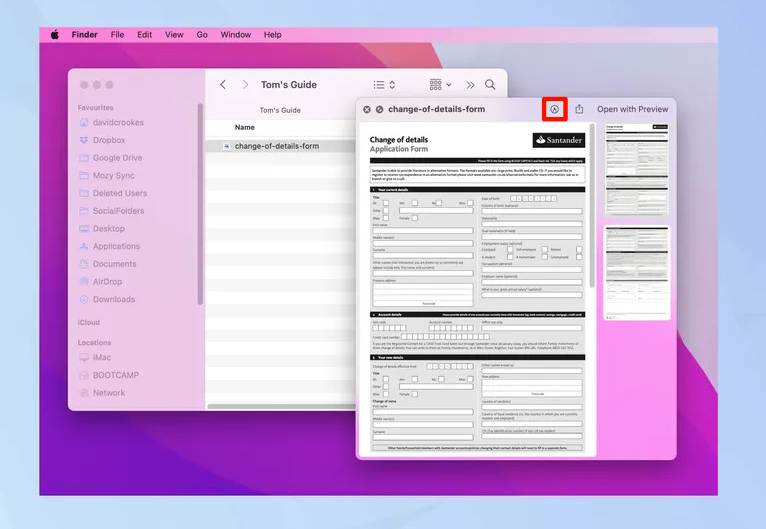
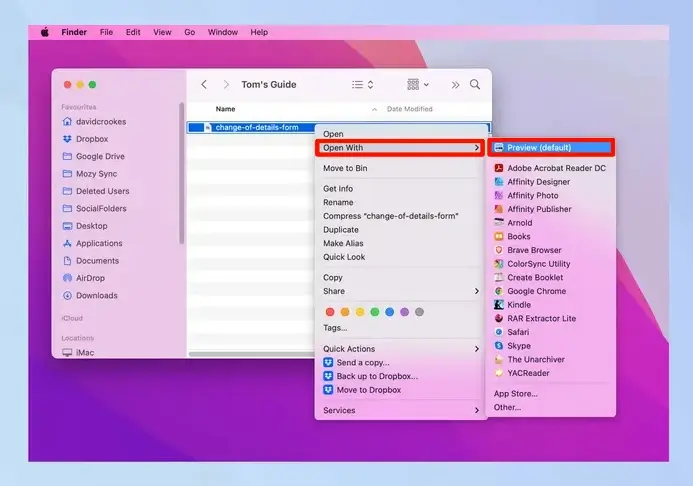
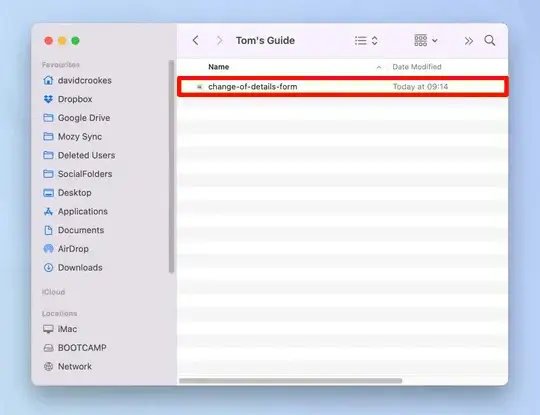
1. Locate the PDF you want to edit. Double-click the PDF to open it in Preview. If it doesn’t open in Preview, right-click the PDF, choose Open With, and select Preview.
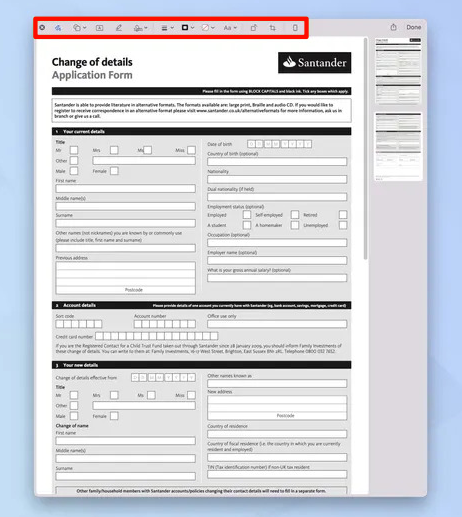
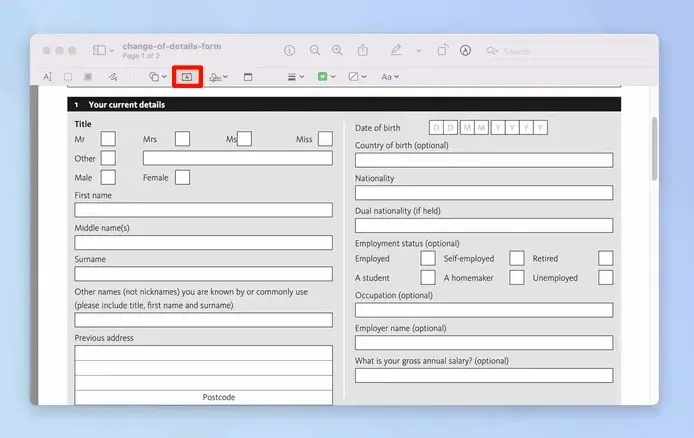
2. Click the pencil icon in the toolbar to display the editing tools.
3. Utilize the bar of editing tools to modify your PDF as needed.

Tip: For tasks that Preview might find challenging, such as compressing or merging PDFs, the Edit PDF Tool by PDF to PDF is an excellent alternative. It’s free and offers more specialized features.
3. Add Text to a PDF on Mac
Adding text to a PDF is often necessary for filling out forms or adding notes. Both Quick Look and Preview, built-in macOS tools, make this easy.
1. Double-click the PDF file to open it in Preview.
If it opens in a different app, right-click the file, select “Open With,” and choose “Preview.”
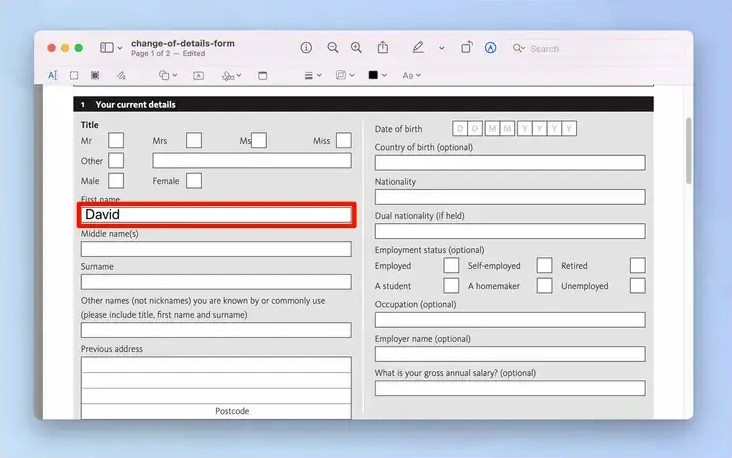
2. In the toolbar, click the text tool icon, which looks like an “A” inside a box. Alternatively, you can go to Tools > Annotate > Text.
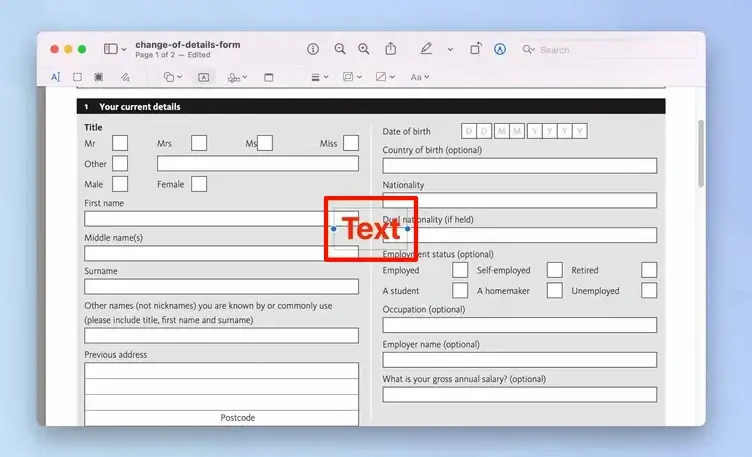
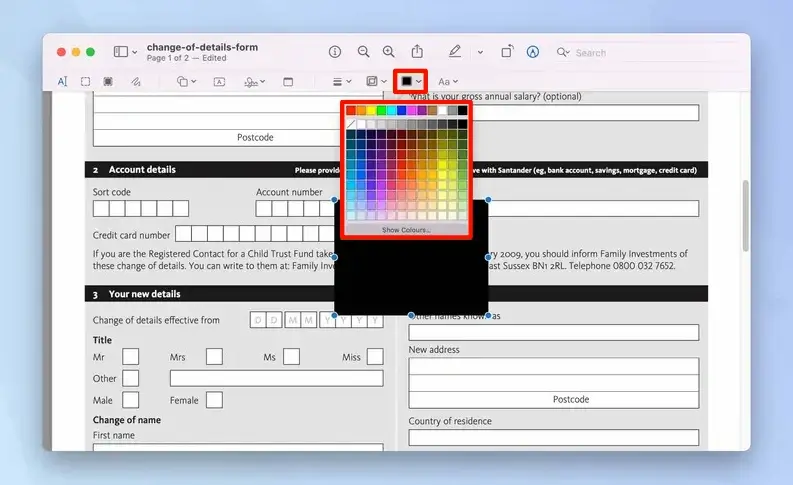
3. The word “Text” will appear on the screen. This text is usually red by default.
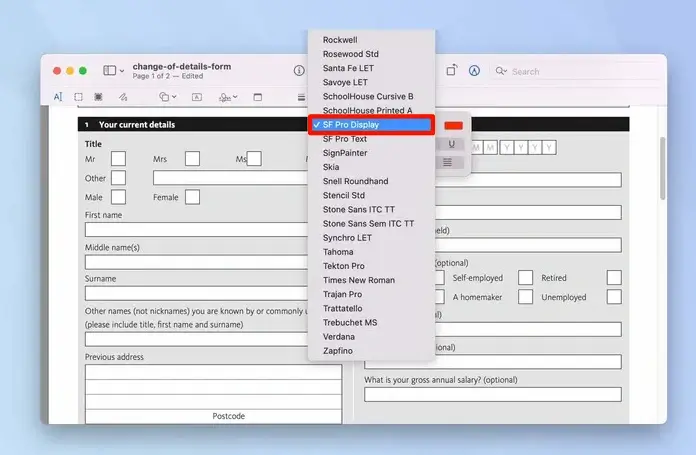
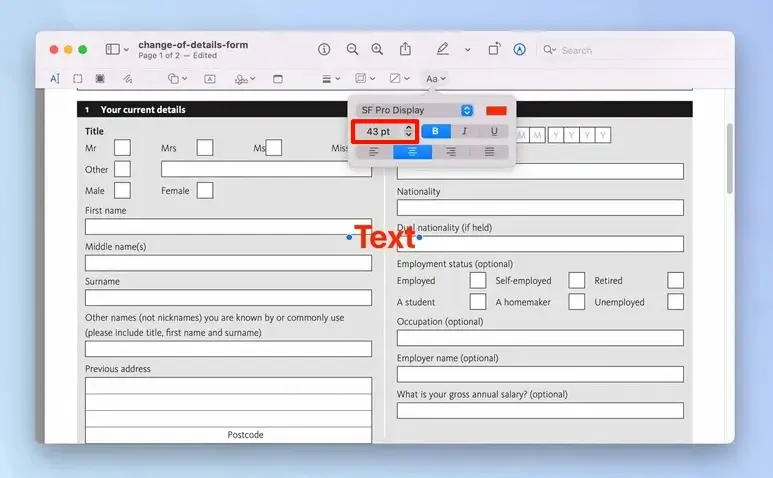
4. Click the Aa icon, then click the red box to choose a different color.

5. Use the Aa menu to select your preferred font and adjust the size by clicking the up and down arrows next to the size number or typing a number in the box.
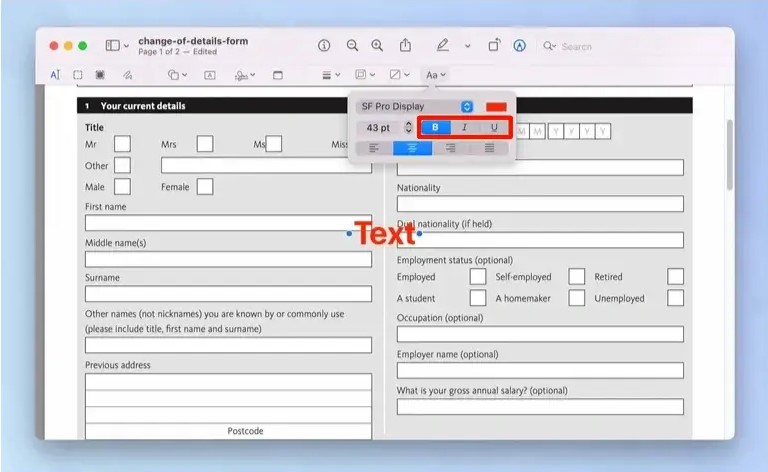
6. Bold, italicize, or underline text by clicking B, I, or U.
7. Click inside the text box to start typing.
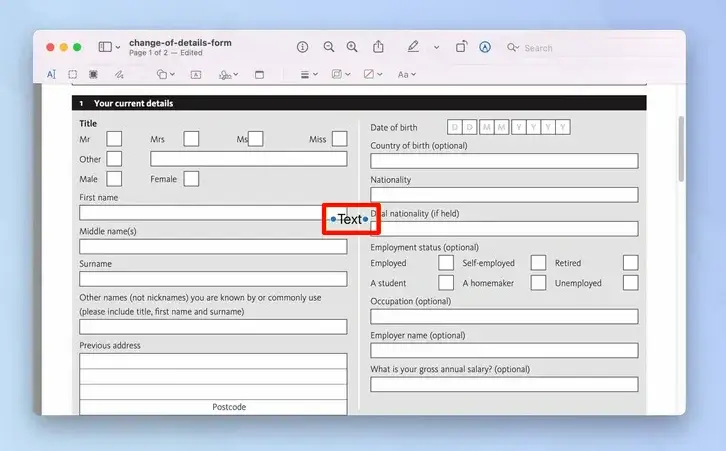
8. Click and drag the text box to position it where you want it on the PDF.
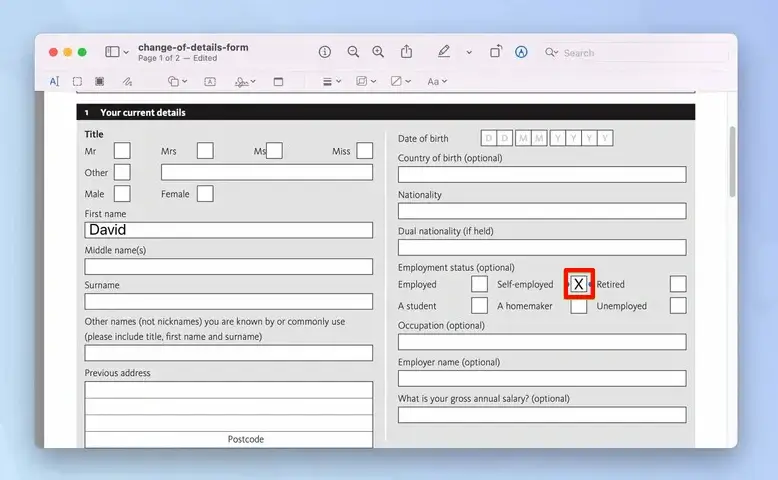
9. Use the text tool to mark boxes with an “X.” Repeat the steps as needed to add more text.
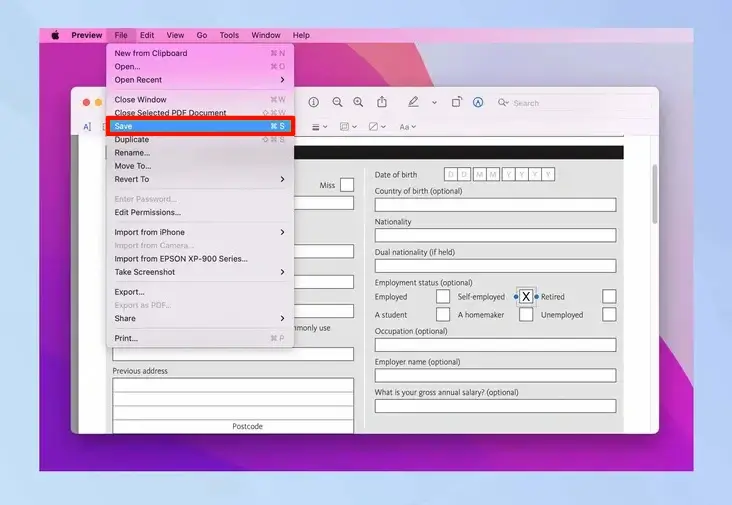
10. When finished, click Done in Quick Look or go to File > Save in Preview.
Tip: For more advanced text editing features, use the Annotate PDF Files Tool by PDF to PDF. It’s perfect for adding extensive annotations and notes.
4. Add a Signature to a PDF on Mac
Signing a PDF is essential for many documents. Quick Look and Preview provide a simple way to add your signature.
1. As before, open your PDF in Preview.
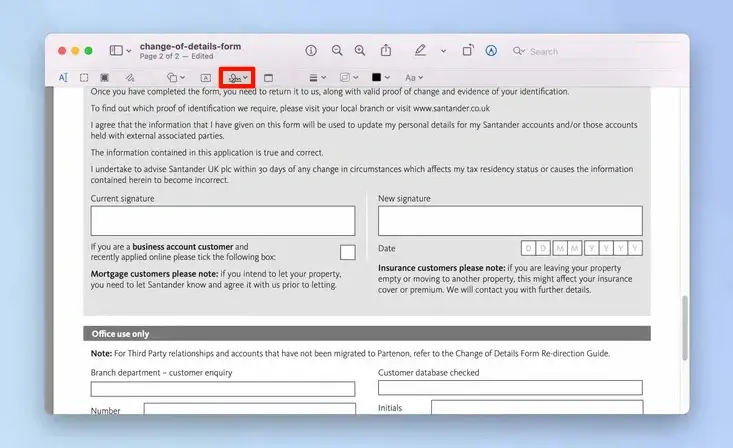
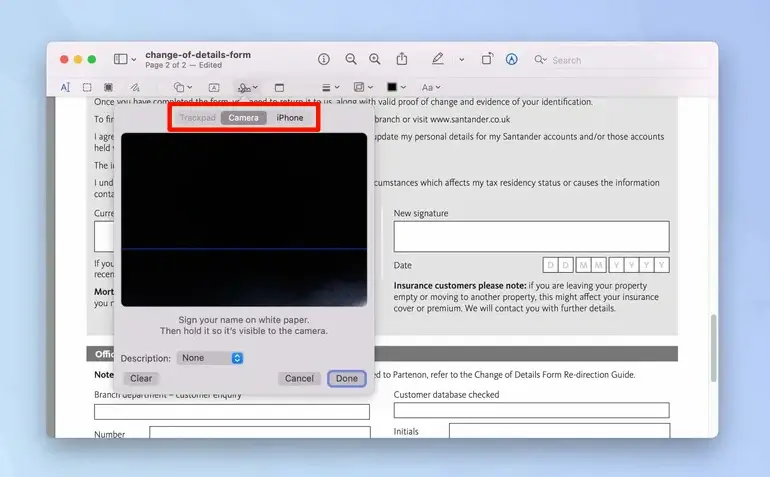
2. Click the signature icon in the toolbar.
3. You have three options:
- Trackpad: Use your finger or a stylus to write your signature on the Mac’s trackpad.
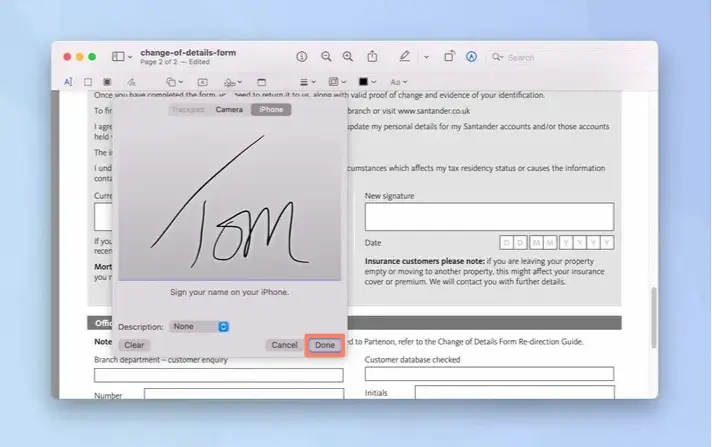
- Camera: Sign your name on a piece of paper and hold it in front of your Mac’s camera to scan it.
- iPhone/iPad: If your iPhone or iPad is signed into the same account as your Mac, use its screen to write your signature.
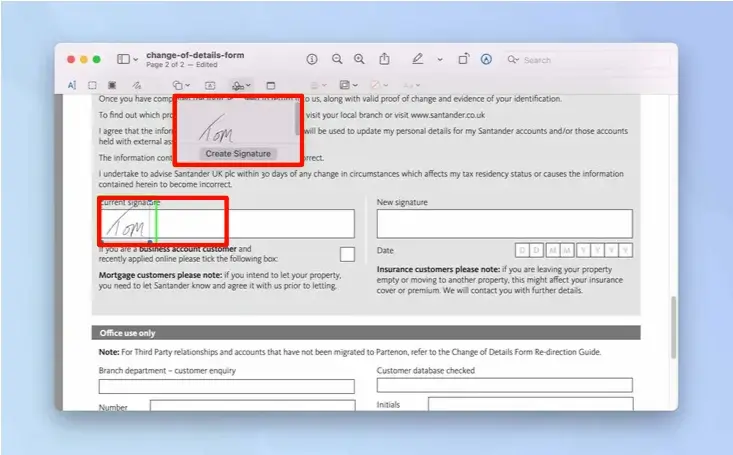
4. Click Done to save your signature or Clear to start over.
5. Click the signature icon, select your signature, and drag it into position.
Tip: For more versatile e-signature options, try the eSign PDF Tool by PDF to PDF. It’s a free and easy-to-use tool for signing documents online.
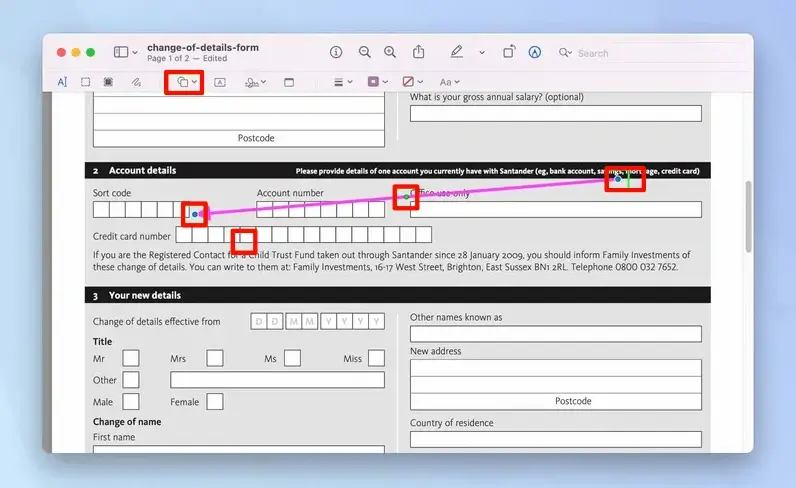
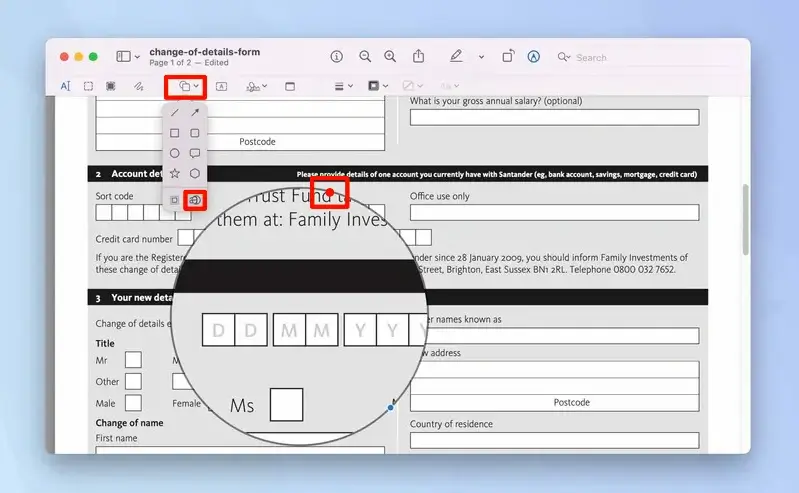
5. Add Shapes to a PDF on Mac
Adding shapes can help highlight important information or create annotations.
1. Open your document in Preview.
2. Click the shapes icon in the toolbar.
3. Select a shape from the dropdown menu (e.g., square, circle, arrow).
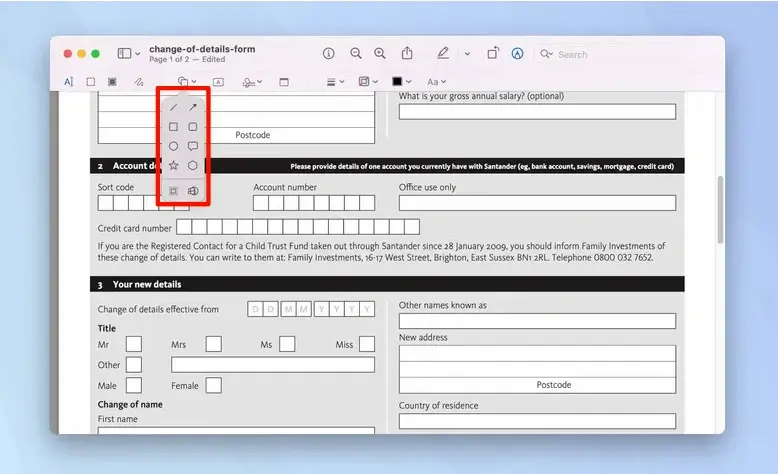
4. Use the color tool to change the fill color and the outline tool to adjust the border color.
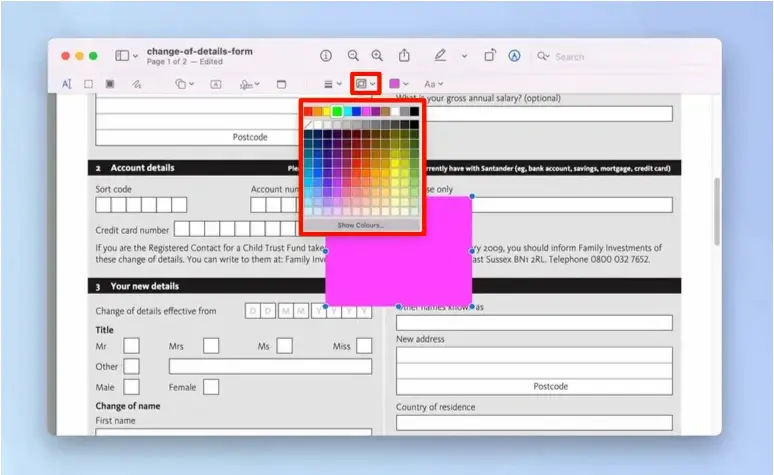
5. Drag the shape to the desired location. Adjust the size and orientation as needed.
6. Click the magnifying glass icon to enlarge text beneath it.
Tip: For more advanced shape and annotation features, use the Annotate PDF Files Tool by PDF to PDF. It’s a free tool that offers comprehensive annotation capabilities.
6. Rearrange Pages of a PDF on Mac
Sometimes, you might need to reorder the pages in a PDF. Preview makes this process simple.
1. Open the document in Preview.
2. Click the view menu icon next to the document name and select Thumbnails.
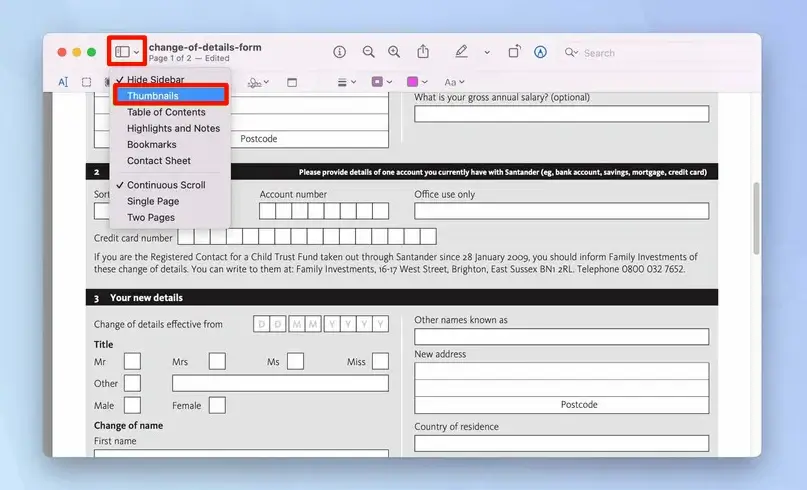
3. Drag the thumbnail images of the pages up or down to reorder them.
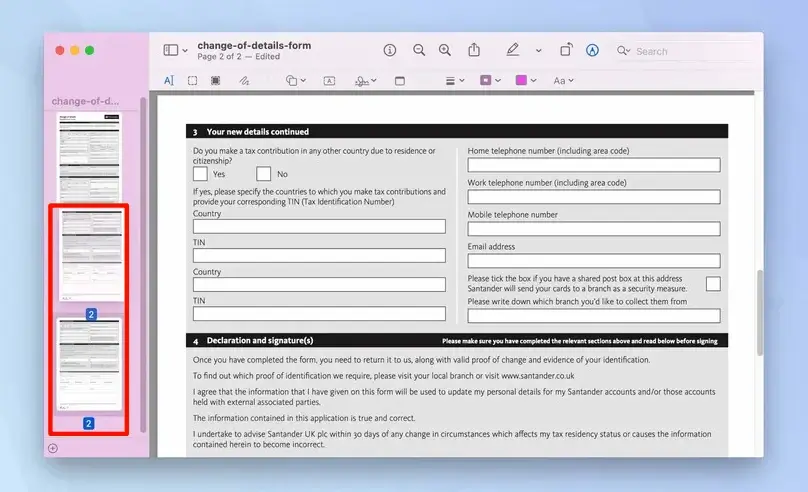
4. Select a page thumbnail and press Delete on the keyboard to remove it.

Tip: Additionally, to organize PDF pages, its a good thing to mark each page of the PDF with its page number. You can use our free tool to add Page Numbers to your PDF Pages for free.
Frequently Asked Questions (FAQs)
Can I edit scanned PDFs on my Mac?
Yes, you can use Preview to annotate scanned PDFs. However, for more advanced editing, consider using an OCR tool.
What if Preview doesn’t meet my needs?
You can use free online tools like PDF to PDF for more advanced editing options.
How do I secure my edited PDFs?
Preview allows you to password-protect your PDFs. Go to File > Export, then select Encrypt.
Can I add images to my PDFs using Preview?
Yes, you can drag and drop images into your PDF while using Preview.
Are there any limitations to editing PDFs on a Mac?
While Preview is powerful, it may not support all advanced editing features. Online tools from PDF to PDF can fill in the gaps.
Editing PDFs on a Mac is straightforward with built-in tools like Quick Look and Preview. For more advanced features, free online tools like PDF to PDF provide additional capabilities to meet your needs. Whether you’re adding text, signatures, shapes, or rearranging pages, this guide should help you navigate the process with ease.
Also Read:
